Packaging your plugin
Before you share your plugin, you'll need to package it up.
This tutorial describes how to package the files of an XD plugin. It's a simple process that can be summarized in three words: compress, rename, and verify.
Prerequisite
- A code-complete plugin (if you don't have one yet, try our Quick Start Tutorial)
Workflow
1. Compress your files as a .ZIP file
Select all files within your plugin's parent folder. On both macOS and Windows you can right-click to compress:
| Platform | Menu item |
|---|---|
| macOS | Right-click > Compress # items |
| Windows | Right-click > Send to > Compressed (zipped) folder |
If you plan to distribute via the XD plugin manager, your .ZIP file must be less than 25MB in size and contain fewer than 3,000 files. You'll only be able to submit for review if your file is under these limits.
You should not compress the plugin's parent folder. Instead, compress the contents of the parent folder. Failure to do so will likely cause a rejection when submitting to the Adobe Developer Console.
2. Rename the .ZIP extension to .XDX
Adobe XD recognizes the .XDX file extension as an XD plugin.
By using this file extension, your plugin automatically gets the "double-click to install" feature, meaning that if you share your plugin directly to users, all they have to do is double-click to install the plugin to Adobe XD.
If you plan to submit your plugin for distribution via the XD plugin manager, renaming your .ZIP to .XDX is required.
3. Verify the packaging worked
Try double-clicking your .XDX file. It should prompt you to install the plugin:
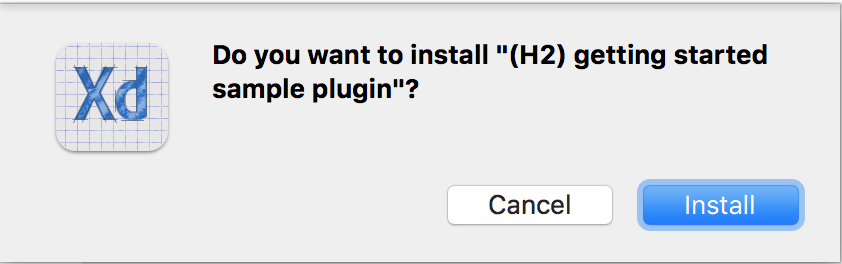
Click install:
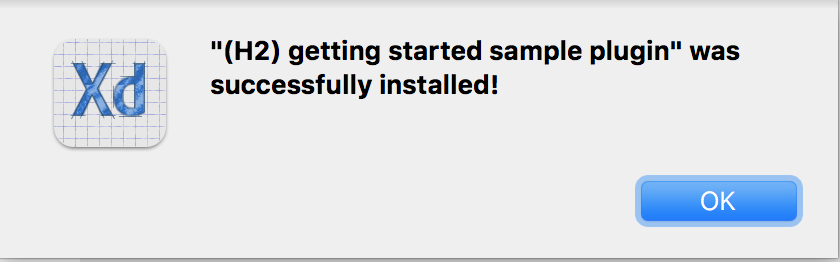
You'll get a success message upon installation, after which the plugin will show up in XD.
Next steps
You've packaged your plugin! Now you're ready to distribute your plugin.
Learn about your options for distributing XD plugins to users.